Wind Sensor
An electronic sensor that accurately measures wind speed and direction, providing critical data for ATC, weather reporting, automated systems, and aircraft operations. Typically uses ultrasonic, cup-and-vane, or hot-wire technology for high-precision wind measurement.
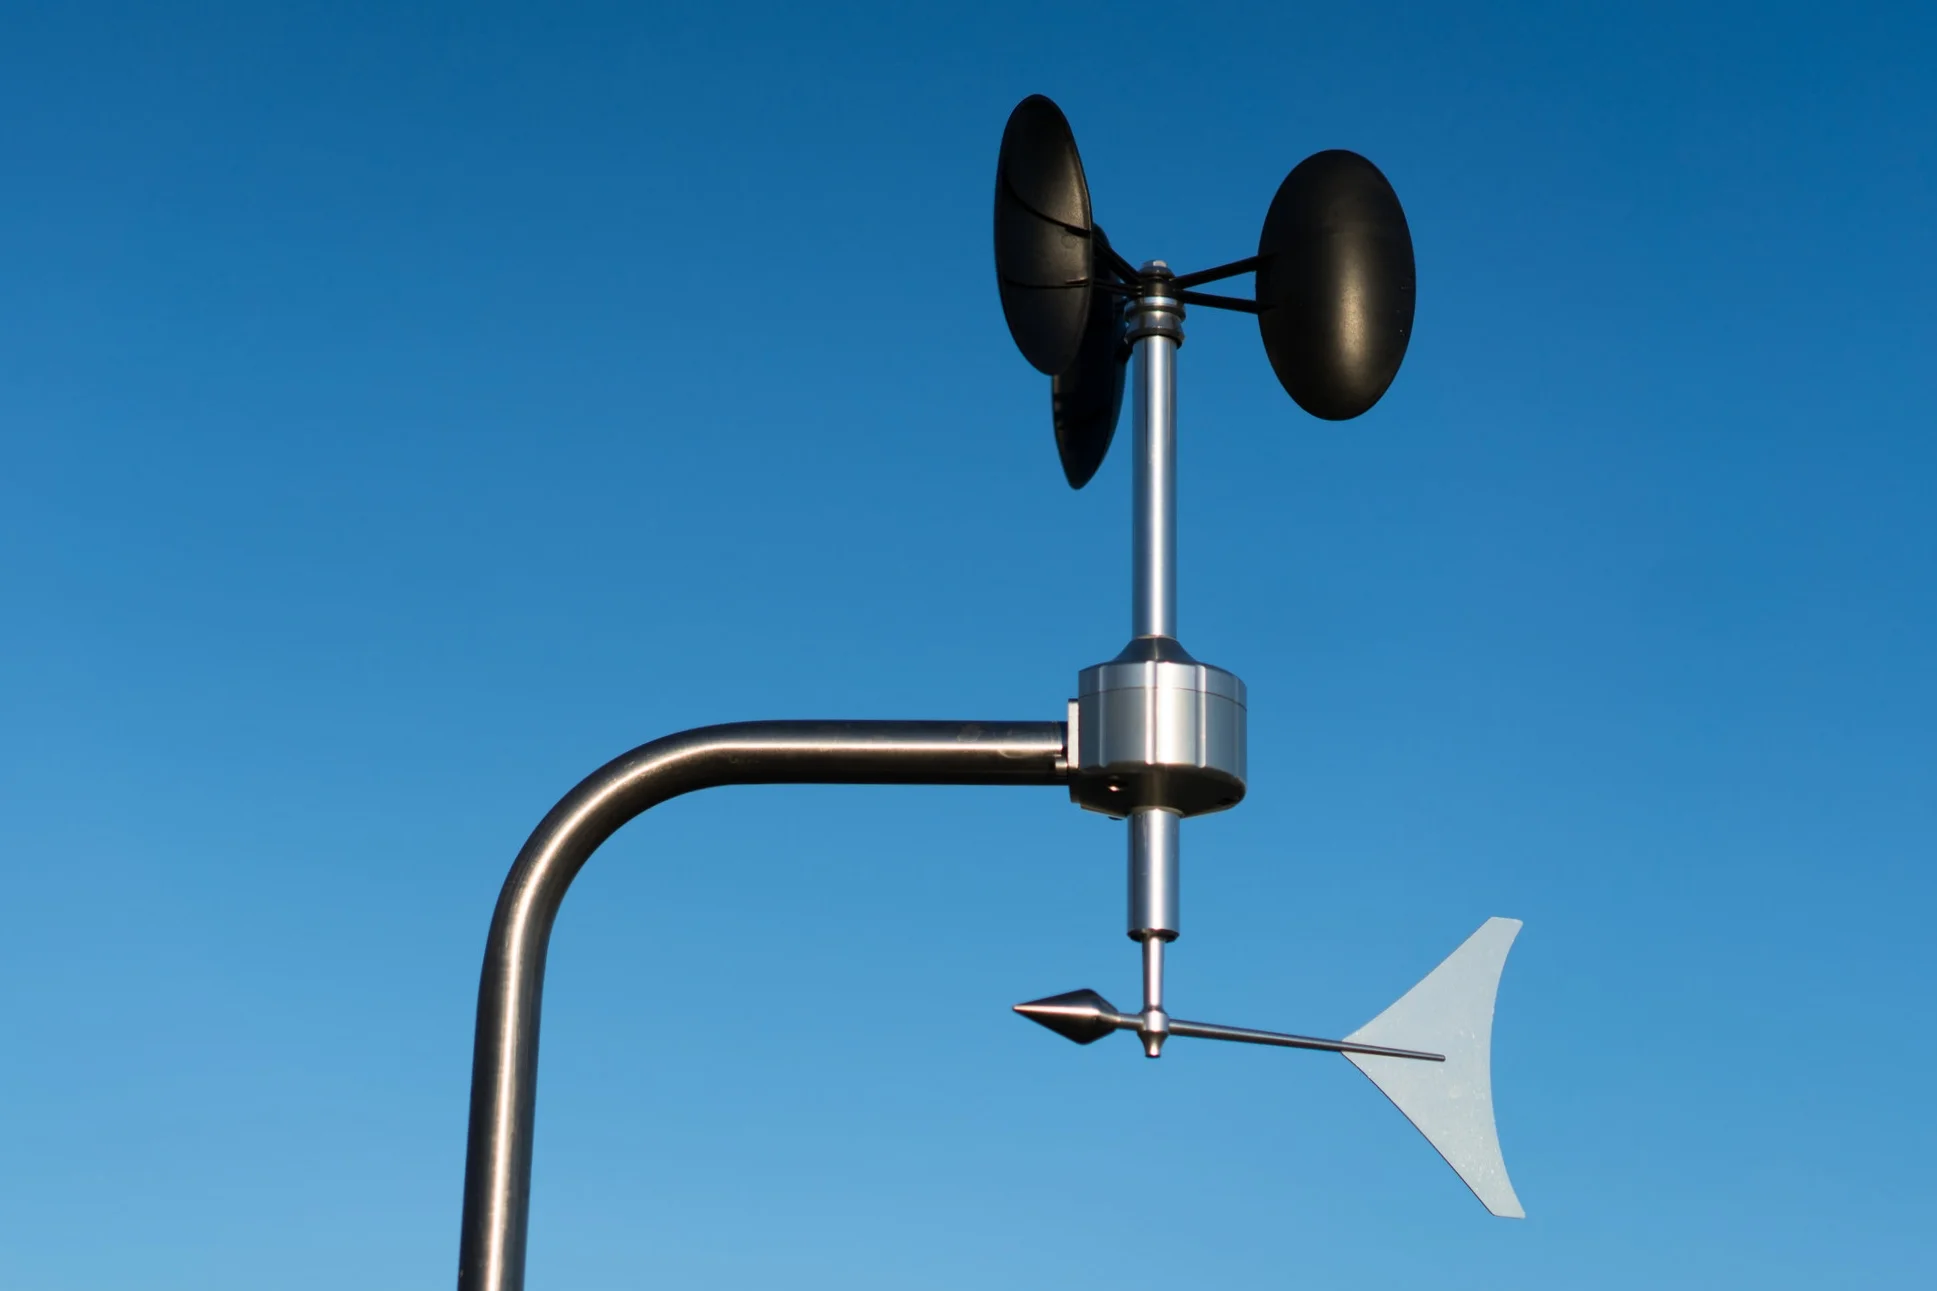
Image disclaimer: For identification and illustration only. It may show a product by another manufacturer and may not depict the exact item described; it is not a statement of any product’s quality, approval or performance. Third-party image and trademark rights belong to their owners. See full notice.
What Is It?
A Wind Sensor is an electronic instrument that measures wind speed and direction with high accuracy, providing real-time data for air traffic control, weather reporting, and automated airfield systems. Unlike traditional mechanical wind cones or anemometers, electronic wind sensors offer precise numerical data that can be integrated into ATC displays, approach systems, and weather networks. Common technologies include: ultrasonic (using sound waves to measure wind speed and direction), cup-and-vane (a classic mechanical design with electronic readout), and hot-wire (using thermal dissipation to measure airflow). Wind sensors are typically mounted on masts or towers at a height of 6–10 metres, away from obstructions, to ensure accurate, undisturbed measurements. The data from wind sensors is critical for runway selection, approach procedures, and aircraft performance calculations.
Purpose & Function
Electronic wind sensors exist to give ATC, pilots, and automated airfield systems precise numerical wind data rather than the approximate visual read a windsock provides, which matters when a crosswind or gust is close to an aircraft's operating limits and a rough visual estimate isn't precise enough to base a safety decision on. Because the data can be fed directly into ATC displays and automated systems, it also supports faster, more consistent runway-selection and go/no-go decisions than would be possible from visual observation alone.
This precision becomes especially valuable during marginal conditions — gusting or rapidly shifting wind — where the difference between an acceptable and an unacceptable crosswind component may be only a few knots, and where a pilot or controller needs a trustworthy number rather than an impression to decide whether an approach or departure should proceed.
Where Is It Used?
Installed at all major airports, military airbases, and many smaller airfields where precise wind data is required. Typically placed near the runway threshold, at the centre of the airfield, or at multiple locations for comprehensive wind coverage. Used for:
- Air Traffic Control – providing real-time wind data for takeoff and landing clearance
- Weather Reporting – feeding data into METAR, ATIS, and AWOS systems
- Approach Systems – providing wind data for ILS and other precision approach systems
- Runway Selection – helping ATC determine the active runway based on wind conditions
- Safety Systems – providing data for runway incursion prevention and emergency response
Wind sensors are also used at heliports, offshore platforms, and temporary airfields where portable weather stations are deployed.
Installation & Location
Mounted on a mast or cross-arm sited in open, unobstructed air, following the same siting principles as the anemometer it is often paired with: clear of buildings, trees, and other masts by a wide margin, and set at the standard meteorological exposure height of around 10 m above ground level, or a lower touchdown-zone height where local practice dictates, to keep readings representative of the wind actually experienced on the runway. Multiple units are typically installed at different points along the airfield to cover local variation, each on its own mast with a concrete foundation and lightning protection and earthing appropriate to its height. Power and data cabling run underground in duct back to the AWOS/ATC display system, and the sensor head is aligned to true or magnetic north during commissioning so direction readings are accurate.
How Does It Work?
The wind sensor operates by measuring the movement of air and converting it into electrical signals. Common technologies include:
- Ultrasonic Sensors: Use pairs of ultrasonic transducers to measure the time-of-flight of sound pulses in different directions. The difference in travel time between pulses sent with and against the wind is used to calculate wind speed and direction. No moving parts, high accuracy, and low maintenance.
- Cup-and-Vane Sensors: A classic mechanical design where a rotating cup assembly measures wind speed (via a magnetic or optical encoder) and a wind vane measures direction (via a potentiometer or optical encoder). Simple, robust, and cost-effective.
- Hot-Wire Sensors: Use a heated wire or thermistor that is cooled by airflow. The cooling rate is proportional to wind speed, and the direction is determined by multiple sensors or a rotating head.
The sensor's electronics process the raw signals and output data via standard communication protocols (RS-485, SDI-12, NMEA, or digital outputs). The data is then fed into ATC displays, weather systems, and automated airfield systems. The sensor is typically housed in a weatherproof enclosure with heating to prevent ice buildup.
System Architecture & Control Logic
Unlike the windsock, the wind sensor is a fully active, addressable instrument with its own control loop rather than a purely mechanical indicator. The sensing element feeds raw signals to onboard signal-conditioning electronics, which digitise the measurement and output it over a standard interface (RS-485, SDI-12, NMEA, or 4-20mA). This is transmitted to a data acquisition unit (DAU) or data concentrator, which polls multiple meteorological sensors across the airfield and aggregates them into a single feed for the AWOS/ATIS processing system. From there, the data drives ATC wind displays, automated METAR/ATIS generation, and runway or approach selection logic. A separate, self-contained control loop operates the sensor's internal heater: a thermostat or RTD switches the heating element on once temperature falls below a set threshold, preventing ice from forming on the transducers or cups, entirely independent of the main measurement path. A heater fault is reported as a maintenance alarm rather than a wind-reading fault — at least until ice actually accumulates and begins to affect the reading.
Sensor Head → Signal Conditioning → DAU → AWOS/ATIS → ATC Display (with independent anti-icing loop)
Sensing to Signal Path
Physical Construction
An electronic wind sensor is built as a sealed instrument head containing the sensing elements — ultrasonic transducers, a cup-and-vane rotor assembly, or hot-wire elements, depending on technology — housed in a weatherproof enclosure of anodised aluminium or corrosion-resistant composite rated to IP66/IP67. Ultrasonic designs have no moving parts, with the transducer arms fixed rigidly to the sensor body so the acoustic path length between them remains precisely known; cup-and-vane designs instead rely on sealed, low-friction bearings supporting the rotating cups and directional vane, which are more exposed to mechanical wear and icing than a solid-state ultrasonic head. Many sensor heads incorporate internal heating elements around the transducer faces, bearings, or vane pivot to prevent ice accretion from stalling the mechanism or blocking the acoustic path in freezing conditions. The sensor mounts on a rigid pole or boom at the standard reference height, positioned clear of nearby structures or turbulence sources, with shielded, weather-rated cable carrying power and signal down to the base-mounted interface or data logger, and all external fasteners and housings built to withstand continuous, unsheltered outdoor exposure.
Technical Parameters
| Parameter | Typical Value |
|---|---|
| Technology | Ultrasonic, cup-and-vane, or hot-wire |
| Wind Speed Range | 0–75 m/s (0–270 km/h) depending on model |
| Wind Speed Accuracy | ±0.1 m/s (ultrasonic) or ±0.5 m/s (cup-and-vane) |
| Wind Direction Range | 0–360° (resolution 1° or better) |
| Wind Direction Accuracy | ±1° (ultrasonic) or ±3° (cup-and-vane) |
| Output Protocols | RS-485, SDI-12, NMEA 0183, analog (4-20mA, 0-10V) |
| Mounting Height | 6–10 m (20–30 ft) above ground level |
| Protection Class | IP66 / IP67 (weatherproof, ice-protected) |
| Power Supply | 230V AC or 12-24V DC (with heater option) |
| Operating Temperature | -40°C to +85°C (with heating) |
Electrical Requirements
| Requirement | Typical Value |
|---|---|
| Supply Voltage | 230V AC (50/60Hz) or 12-24V DC, model dependent |
| Sensor Power Draw | 2-5W unheated; 50-100W+ with anti-icing heater active |
| Heater Circuit | Separate supply, thermostat/RTD switched, independent of the signal path |
| Signal Output | RS-485, SDI-12, NMEA 0183, or analog 4-20mA / 0-10V loop |
| Cable Type | Shielded, weather-rated multi-core; twisted pair for RS-485/SDI-12 runs |
| Cable Run Length | Up to 1200m (RS-485 digital); shorter runs for unboosted 4-20mA analog loops |
| Surge/Lightning Protection | Line and signal surge arrestors at sensor base and DAU entry point |
| Earthing/Grounding | Mast/boom and sensor enclosure bonded to airfield earth grid |
| Power Source | DAU-fed or dedicated mains circuit, UPS-backed at the DAU/AWOS end |
Applicable Standards
ICAO Annex 3
Meteorological service for international air navigation
WMO No. 8
Guide to meteorological instruments and methods of observation
FAA AC 150/5220-16
Airport weather observation systems
Installation Requirements
Mast Foundation & Earthing
CivilSet each mast on a concrete foundation with lightning protection and earthing appropriate to its height, since multiple units are often installed at different airfield points.
Mounting Height & Siting Clearance
CivilPosition the sensor at the standard 10 m reference height, or the lower touchdown-zone height where local practice dictates, clear of buildings and other masts.
Cable Route to AWOS/ATC Display
ElectricalRun power and data cabling underground in duct back to the AWOS/ATC display system.
True/Magnetic North Alignment
MechanicalAlign the sensor head to true or magnetic north during installation so direction readings are accurate from first energisation.
Heater Circuit Wiring
ElectricalOn heated models, terminate the anti-icing heater supply on its own protected circuit around the transducer faces, bearings, or vane pivot.
Output Protocol Configuration
ElectricalConfigure the sensor's output protocol (RS-485, SDI-12, NMEA, or analogue) and address so its readings are individually identifiable on the network.
Pre-Energisation Sign-off
DocumentationRecord each mast position, cable route, and north-reference alignment as-built before the sensors are accepted for commissioning.
Testing & Commissioning
Insulation Resistance & Continuity Test
Pre-EnergisationMegger-test power cabling and verify signal cable continuity before the sensor is energised, ruling out faults introduced during installation.
Power-Up & Self-Test
EnergisationEnergise the sensor and confirm it passes its internal self-diagnostic routine, whether ultrasonic, cup-and-vane, or hot-wire type.
Transducer/Vane Alignment (True North Referencing)
Functional TestConfirm the sensor's zero-direction reference is correctly aligned to true north using a survey-grade compass or sighting method.
Wind Speed Calibration Verification
Functional TestVerify wind speed output against a portable calibrator or reference anemometer across the operating range before acceptance.
Wind Direction Calibration Verification
Functional TestVerify direction output against a reference bearing at multiple points around the compass before acceptance.
Heater Element Function Test
Functional TestConfirm the anti-icing heater activates correctly to keep transducers, cups, or vanes free of ice buildup.
Communications & Output Interface Test
Final AcceptanceConfirm wind speed and direction data reports correctly to ATC displays and airfield weather systems before handover.
Documentation & As-Built Sign-off
Final AcceptanceRecord calibration, alignment, and communications test results alongside as-built position in the commissioning dossier for handover.
Inspection & Maintenance
Calibration Verification
AnnualCheck wind speed and direction output against a certified reference to confirm accuracy stays within the ±0.1–0.5 m/s and ±1–3° specifications.
Sensor Element Cleaning
QuarterlyClean ultrasonic transducers or cup-and-vane elements of dust, insect residue, and salt film so readings stay accurate and unobstructed.
Heater Function Check
AnnualTest the heating element ahead of the icing season, since frost or ice buildup on cups, vanes, or ultrasonic transducers can stall or bias readings.
Bearing & Moving Parts Lubrication
Semi-annualFor cup-and-vane sensors, lubricate bearings and confirm free rotation, since friction here directly biases wind speed readings low.
Output Signal & Communication Link Test
Semi-annualConfirm the sensor's RS-485/SDI-12/NMEA 0183/analog output reaches the AWOS or ALCMS correctly and without signal noise.
Seal & Weatherproofing Inspection
AnnualCheck housing seals and gaskets for cracking or degradation and confirm the IP66/IP67 rating is still intact.
Mounting Height & Alignment Verification
AnnualConfirm the sensor remains at the specified 6–10m height and correctly oriented to true north, since misalignment biases every direction reading.
Cable & Connector Inspection
AnnualExamine signal and power wiring for corrosion or loose terminations, a common source of erratic or dropped-out readings.
Common Field Issues
Icing and Snow Accumulation
Ice buildup on the sensor (especially cup-and-vane or ultrasonic transducers) can cause inaccurate readings or complete failure. Heated sensors and regular de-icing are essential in cold climates.
Obstruction-Induced Turbulence
Placing the sensor too close to buildings, trees, or other structures can cause turbulence and inaccurate readings. Proper siting with clear fetch (at least 10 times the obstacle height) is critical.
Signal Interference and Data Corruption
Electromagnetic interference from nearby radar, transmitters, or power lines can corrupt sensor data. Using shielded cables, proper grounding, and optical isolation is recommended.
Troubleshooting Guide
Erroneous or No Wind Speed/Direction Reading
Signal Dropout or Corrupted Data at the Display/Recorder
Readings Consistently Inaccurate Compared to a Reference Instrument
Heater Not Functioning in Cold Weather
Mechanical Sensor Not Rotating Freely (Cup/Vane Type)
Failure Modes & Root Causes
Icing of Sensing Elements
Bearing Wear or Seizure (Mechanical Types)
Transducer / Sensor Module Failure
Heater Element Failure
Cable / Grounding Fault (EMI Susceptibility)
Calibration Drift / Siting-Induced Turbulence
Safety & Operational Notes
Electrical Isolation Before Servicing
Electrical SafetyDe-energise the sensor supply and, separately, the anti-icing heater circuit before opening the housing or disconnecting cable, since the heater is thermostat/RTD-switched on an independent supply from the signal path.
Moving Parts / Pinch Hazard
MechanicalCup, vane, or propeller assemblies can rotate in ambient wind even with the sensor powered down; secure or restrain the moving assembly before hands-on work and keep fingers clear.
Hot Heating Element
Personnel SafetyAllow the anti-icing heater to cool before handling after active operation; heater draw can reach 50-100W, well above the sensor's unheated power consumption, and the housing can retain heat after shutdown.
Storm and Lightning Exposure
Electrical SafetyAvoid mast-top work during an electrical storm or high wind, and confirm mast grounding and surge protection are intact before returning the sensor to service after lightning activity.
Airside Work Coordination
OperationalWork on masts within the aerodrome's obstacle-limitation surfaces or movement area requires ATC/airside coordination and a NOTAM where wind data will be unavailable, with vehicle access following the aerodrome's safety management procedures.
PPE and Grounding
Personnel SafetyUse insulated tools when working on live-adjacent connections, and confirm the sensor and mast bonding/grounding are intact before reconnecting supply.
Restore to Compliant State
ComplianceConfirm the sensor is reporting correctly on both the signal path and heater status before closing out maintenance, and cancel the associated NOTAM once wind data is confirmed reliable.
Engineering & Expert Notes
Verify the Heater Ahead of Winter, Not Just in Summer Testing
MaintenanceAn ultrasonic transducer with a failed or absent heater can ice over silently, losing accurate wind data exactly when icing conditions make it most critical; verify heater function specifically ahead of winter rather than relying on a functional test performed in mild weather.
Trend Low-Wind Readings to Catch Bearing Wear Early
DiagnosticsCup-and-vane bearing wear typically shows up first as underreporting at low wind speeds, from an increased starting threshold, before it affects high-speed accuracy; trend low-speed readings specifically rather than judging bearing condition from strong-wind performance alone.
Verify True North Alignment as Its Own Check Item
AlignmentA sensor that's mechanically sound but rotated a few degrees off true north introduces a systematic direction bias that's easy to miss without a dedicated alignment check; verify north reference specifically after any remount or maintenance, not just electrical function.
Clean Hot-Wire Elements on a Tighter Cycle in Coastal or Dusty Sites
CalibrationHot-wire sensor elements are sensitive to contamination from dust or salt, which changes their thermal response and skews readings gradually; clean and re-verify calibration more frequently at coastal or dusty airfields than the sensor's generic maintenance interval assumes.
Investigate Small Offsets Between Redundant Sensors Early
VerificationWhere a backup wind sensor is fitted, comparing it against the primary is the fastest way to catch a slow calibration drift in either unit; investigate a small but persistent offset between paired sensors rather than waiting for a large discrepancy to prompt action.
Verify the Full Data Chain to the Display, Not Just the Sensor
ConfigurationA unit mismatch, such as knots versus metres per second, introduced anywhere between the sensor and the ATC display can silently misrepresent wind data even when the sensor itself is perfectly calibrated; verify the complete chain through to the displayed value, not just the sensor's own output.
Frequently Asked Questions
Short answers about airfield wind sensors: technologies, accuracy, siting, outputs, standards, maintenance and common faults.
Q1What is an airfield wind sensor?
A wind sensor is an electronic instrument that measures wind speed and direction and supplies real-time numerical data for air traffic control, weather reporting and automated airfield systems. Unlike a wind cone it gives precise figures that can feed ATC displays, approach systems and weather networks.
Q2What types of wind sensor are used?
Ultrasonic sensors, which time sound pulses between transducer pairs and have no moving parts, cup-and-vane sensors, a classic mechanical design with electronic readout, and hot-wire sensors that use thermal dissipation to measure airflow.
Q3How accurate is an airfield wind sensor?
Ultrasonic units are typically accurate to ±0.1 m/s in speed and ±1° in direction. Cup-and-vane units are typically ±0.5 m/s and ±3°. Speed range is up to 75 m/s (270 km/h) depending on model, and direction covers 0–360°.
Q4Why use an electronic wind sensor instead of a windsock?
A windsock gives only an approximate visual read. A sensor gives precise numerical wind data, which matters when a crosswind or gust is near an aircraft's operating limits, and it feeds ATC, runway selection, METAR, ATIS and AWOS systems directly.
Q5Where should a wind sensor be installed?
On a mast or cross-arm in open, unobstructed air, well clear of buildings, trees and other masts. Height is typically about 10 m above ground level (6–10 m range), or a lower touchdown-zone height where local practice dictates, so the readings represent the wind at the runway. Some airfields use several sensors for coverage.
Q6What outputs does a wind sensor provide?
Digital RS-485, SDI-12 or NMEA 0183, or analog 4–20 mA or 0–10 V. RS-485 runs can reach up to 1,200 m using shielded twisted-pair cable, while unboosted analog loops need shorter runs.
Q7How are wind sensors powered and protected from ice?
They run on 230 V AC or 12–24 V DC, drawing 2–5 W unheated and 50–100 W or more with the anti-icing heater active. The heater has a separate thermostat or RTD-switched supply. Line and signal surge arrestors sit at the sensor base and the data acquisition unit entry point.
Q8Which standards apply to wind sensors?
The main references are ICAO Annex 3 (meteorological service for international air navigation), WMO No. 8 (guide to meteorological instruments and methods of observation) and FAA AC 150/5220-16 (airport weather observation systems). Always verify the current edition and your national authority's requirements.
Q9How often should a wind sensor be maintained?
Typical intervals are quarterly for sensor element cleaning, semi-annual for bearing lubrication on cup-and-vane units and output signal and communication link tests, and annual for calibration verification against a certified reference and heater function checks before icing season. Your approved maintenance programme takes precedence.
Q10Why is my wind sensor giving wrong or no readings?
Common causes are ice on the cups, vane or ultrasonic transducers, bearing seizure or a faulty transducer or module. Check heater status, inspect for ice or debris and run a self-test. If the signal drops out or is corrupted at the display, suspect electromagnetic interference, a faulty cable or connector, or a grounding fault.
Related Components
Go Beyond the Component. Understand the Complete AGL System.
You have explored the component. Now understand how it works within the complete Airfield Ground Lighting system.
Learn AGL from fundamentals to design, installation, testing, photometry, commissioning, maintenance and troubleshooting through structured technical training at Precision AGL Academy.
Build practical knowledge. Understand the circuit. Read the standards. Troubleshoot with confidence.
Your next step in AGL starts here.
Need expert guidance on wind sensor selection or installation?
Precision AGL Academy provides advice on sensor technology, siting, and integration with ATC and weather systems.
Follow the Academy
Important Notice, Disclaimer & Limitation of Liability
Please read before relying on any content on this page.
- Purpose and intended users. This page on Wind Sensor is an independent educational and informational reference for competent, suitably trained and authorised airfield ground lighting (AGL) and aerodrome electrical personnel. It is not professional engineering, legal or regulatory advice, and using it does not create any professional or client relationship.
- Safety. Work on series circuits, constant current regulators (CCRs), isolating transformers, cables, connectors and lighting equipment can be fatal. Always apply the aerodrome’s permit-to-work and isolation/LOTO procedures, prove dead, use correctly rated instruments and PPE, and follow the manufacturer’s instructions. Nothing here authorises work on live equipment or the bypassing of any safety device or interlock.
- Aviation operations. Nothing here authorises installation, modification, energisation, adjustment, return to service, a change of operating category (CAT I/II/III), a NOTAM or any aerodrome certification or approval decision. These rest with the aerodrome operator, the air navigation service provider and the competent regulator.
- Specifications, ratings and typical values. Descriptions, parameters, ratings, dimensions, photometric values, wattages, service lives, maintenance tasks and intervals, failure modes, certifications (for example CE, FCC, UL or IEC marks) and part or type designations are general, typical and indicative. They may not match any particular product, make, model or version, and they are not a datasheet, design, specification, selection, sizing, procurement or acceptance criterion. The manufacturer’s current documents, the approved design and the project specification prevail.
- Standards and regulations. References to ICAO, FAA, IEC, IEEE, ISO, BIS, DGCA and other standards are paraphrased summaries for orientation only. They may be incomplete or out of date, and standards are revised from time to time. Consult the current official editions. Following this content does not guarantee compliance with any law, standard or regulatory approval, and the regulator’s requirements always prevail.
- No warranty. Content is provided “as is” and “as available”, without warranty of any kind, express or implied, including accuracy, completeness, currency or fitness for a particular purpose. Real installations differ in design, equipment make and model, age and condition.
- Limitation of liability. To the fullest extent permitted by applicable law, Precision AGL Academy, Precision AGL Solutions and their owners, authors and contributors are not liable for any injury, death, loss, damage, downtime, penalty or regulatory consequence, whether direct or indirect, arising from the use of, reliance on, or inability to use this content. Nothing in this notice excludes or limits any liability that cannot lawfully be excluded or limited.
- Independence, brands and no endorsement. This is an independent publication. It is not affiliated with, sponsored by or endorsed by ICAO, the FAA, the IEC, DGCA, AAI, any airport, regulator, supplier or equipment manufacturer. Third-party names, product designations, standard designations and trademarks (including Megger®, Siemens, Eaton, Crouse-Hinds, ADB SAFEGATE, Fluke, ABB and Honeywell) belong to their respective owners and are used only for identification and description. Mention of a brand, product or supplier is not a recommendation, and we do not sell, supply or quote for any component described.
- Images and third-party content. Images and illustrations are shown to help identify the type of component. They may show products of various manufacturers, may not depict the exact item described, and are not a statement about any product’s quality, approval or performance. Copyright and trademarks in third-party images, logos and photographs belong to their respective owners and are not claimed as ours. If you are a rights holder and want an image removed, replaced or credited, email precisionaglsolutions@gmail.com with the page address and we will act promptly.
- Training and services. Mentions of training, courses, consultation, advice, selection, installation, calibration or other support, including the “Learn…Certify” pathway, describe learning stages and are not an offer, quotation, tender or promise of any result. Contacting us or our replying creates no engagement or duty of care; an engagement exists only under a written agreement. We are not a regulator or certification body, and completing any course or reading this content is not a certification, accreditation or authorisation to work on any aerodrome.
- Copyright, privacy and corrections. © 2026 Precision AGL Academy. All rights reserved. Text, structure, compilations and diagrams may be viewed for personal reference and internal training only; any other copying, republication or commercial use needs our written permission. If you email, telephone or message us, we use your details only to respond and handle your matter, in line with applicable Indian law including the Digital Personal Data Protection Act, 2023; please do not send confidential or security-sensitive information. To display this page your browser requests fonts, icons and images from third-party servers, which receive your IP address and browser details under their own policies. Content is reviewed periodically with no obligation to update. To report an error, safety concern or rights issue, write to precisionaglsolutions@gmail.com.